
I’ve been tinkering around on the web for a long time. The first website I started was in 2011 or 2012. But I’m not a professional web designer. And, frankly, none of the website I created made me much money (except for the website for my law practice, which was great!). However, I definitely know about starting a website.
I’ve previously explained why I started this project. In this post, I will explain how I got this website up and running. After all, the purpose of this website is to share what hobbies I’m working on as I go. It just so happens that starting a website is one on my hobbies.
Step 1: Buy a domain
The domain is like your address–the plot of ground where your house is located. The webhost is the platform you use to actually build your house.
Buying a domain can be easy or quite complex depending on how careful you want to be in relation to intellectual property.
Buying Domains can be Easy
On the easy side, it’s just a matter of finding a domain host like GoDaddy or Google Domains and buying an available domain name. If you know how to shop for anything online, you can shop for a domain. I have mostly used GoDaddy to purchase domains. I have more recently started using Google Domains just because it was a bit less expensive.
Considering Intellectual Property when buying domains.
On the complex side of domain buying, you don’t want to purchase and build a successful domain using a name that is owned by someone else. The ownership of a tradename is an intellectual property right. Under US law, whoever uses a tradename in commerce first has a claim to the exclusive use of that name. A person may elect to strengthen a claim to a tradename by registering it as a trademark with the United Stated Patent and Trademark Office (USPTO).
It’s therefore a good idea to at least make sure the domain name you want has not already been registered by someone else in the USPTO database. You can search the USPTO database here: https://www.uspto.gov/trademarks/search. You can also visit Trademarkia.com and see what information their search pulls up. Trademarkia is run by an attorney. This attorney has not only built a nice, useful website, but I’ve personally seen that he aggressively polices the trademark environment (whether that’s good or bad is debatable).
These types of searches are good starting points. “Clearing” a name can get as expensive and detailed as you want or need it to be. There are companies that specialize in searching federal and state databases, online sources, newspapers, public records, and even international sources to get a more complete picture of whether a tradename may run into intellectual property battles.
Whether you worry about intellectual property and how much you worry about it is a personal decision. For me, I’ve done the basic searching explained above and have generally considered it to be good enough for my purposes.
Step 2: Get Webhosting & Find your Domain Nameserver
Again, once you’ve secured your plot of land as your domain, you need to decide what platform you will use to build on that land. This is the webhost. It “hosts” your domain on the web.
I’ve used a bunch of different webhosts: HostGator, WpEngine, Siteground, and some I can’t even remember. Another one you may see a lot is BlueHost. I’ve never used that one. It does seem to have a lot of people advertising them. I think that’s because they may have an attractive affiliate program. I’m not totally. Again, I’ve never personally used BlueHost. You may see it around but I don’t have much to say about it.
The one I’ve stuck with the longest is HostGator. The plans are relatively inexpensive and allow for a lot of flexibility. Although thankfully this has been rare, I have had websites go down (due to my errors or issues with various theme or plugin updates). HostGator support helped me solve the problems 100% of the time. I’ve been on their baby plan for about the last decade.
Once you have your host, you need to create your domain folders and find your namehost address. In hostgator, you can create your domain and find your namehost address on the c-panel.
On the cpanel, you should be able to find the nameserver address here:
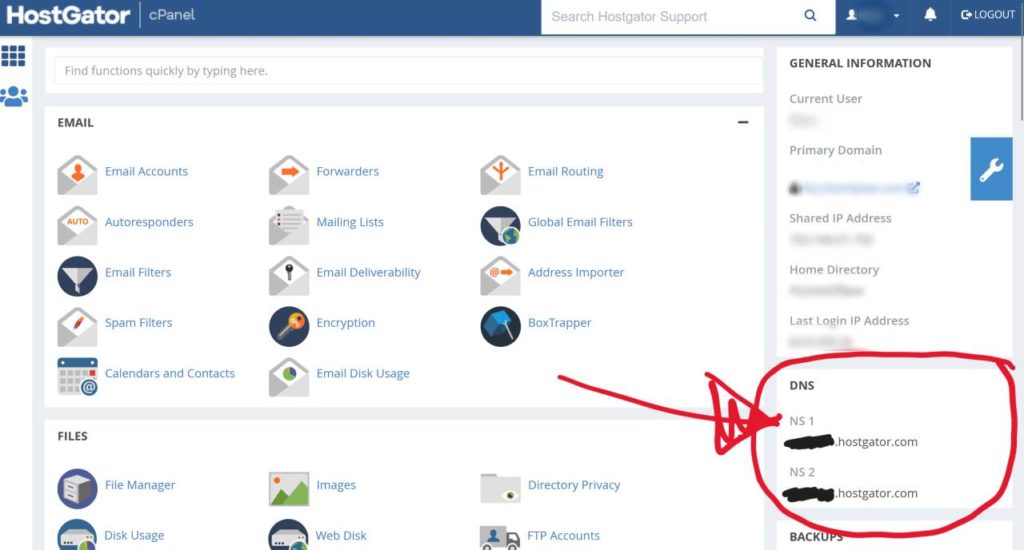
Copy those addresses for the next step, which is pointing your domain to these nameservers. This is done by going back to your domain provider.
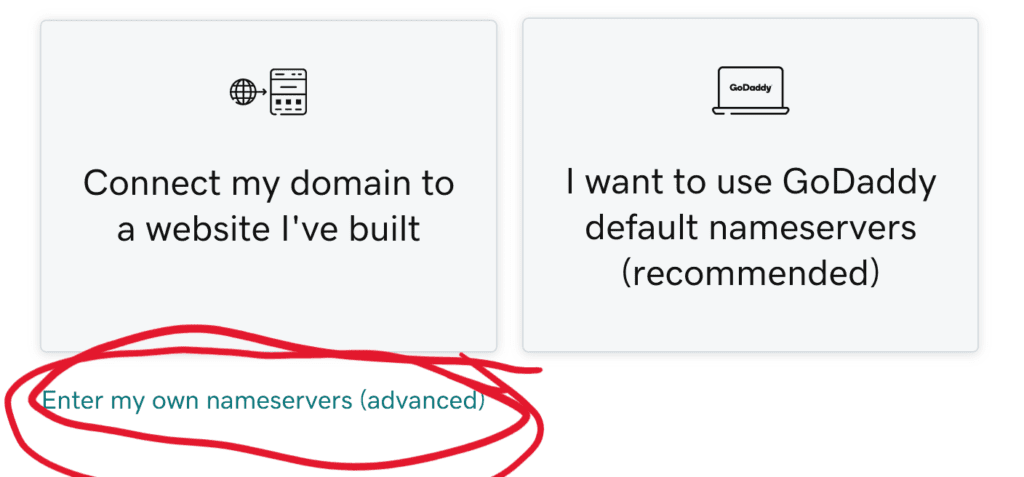
Step 3: Point your Nameservers on your Domain to your Webhost.
Your domain provider points your domain to the webhost. Unless your domain provider is also your webhost, you need to point the domain to your selected webhost. I will show you how to do it on GoDaddy and Google Domains.
Changing your Nameservers on GoDaddy:
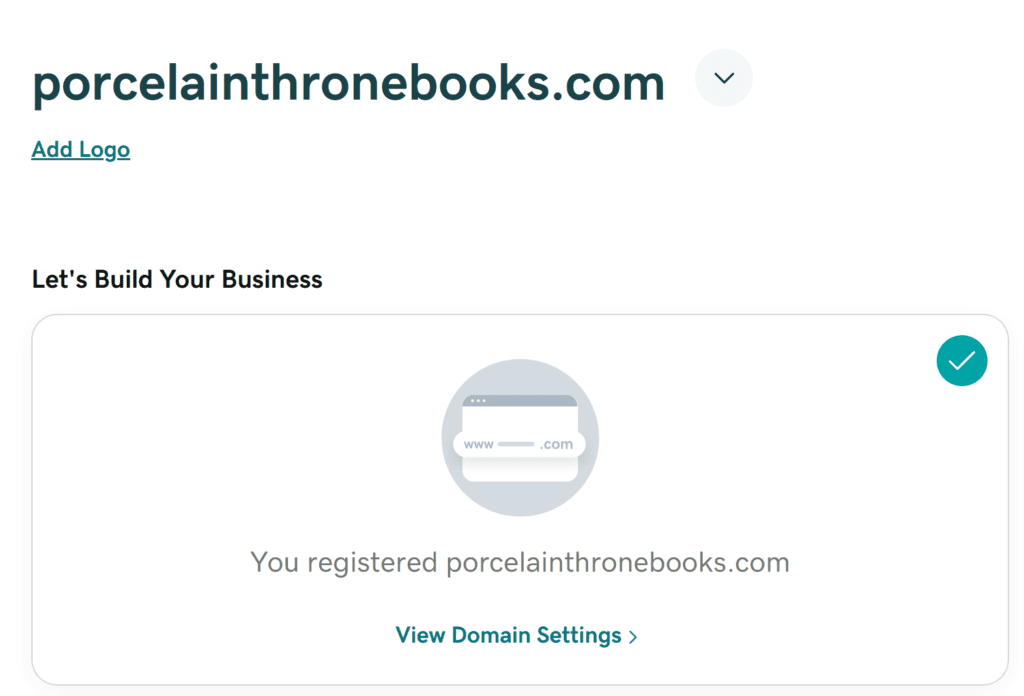
On your main account page, scroll down to your selected domain. In this case, I’m using www.porcelainthronebooks.com (a website I was using for creative writing). Then click “View Domain Settings.”
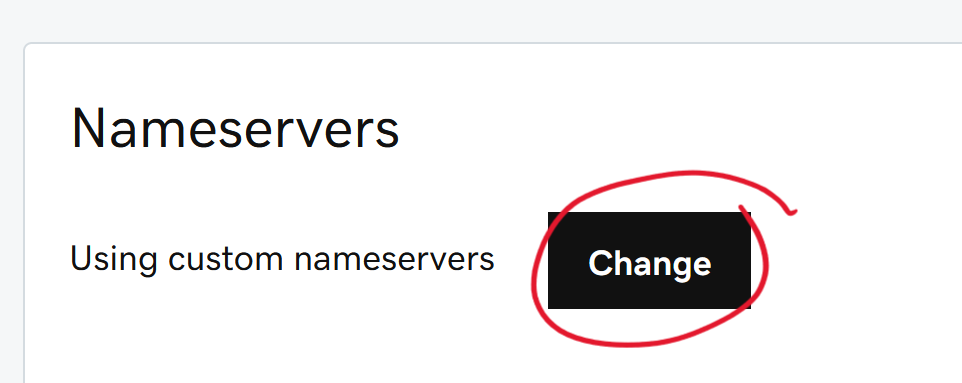
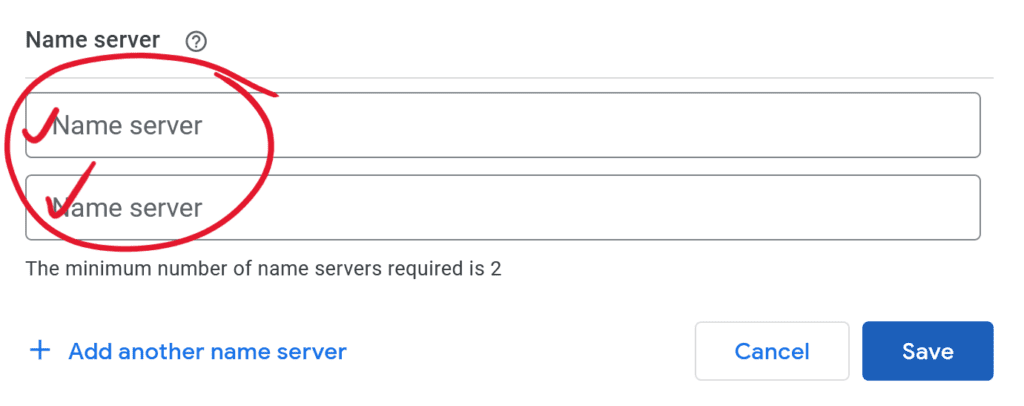
You then put in the two nameserver addresses that you get from your webhost in the prior step.
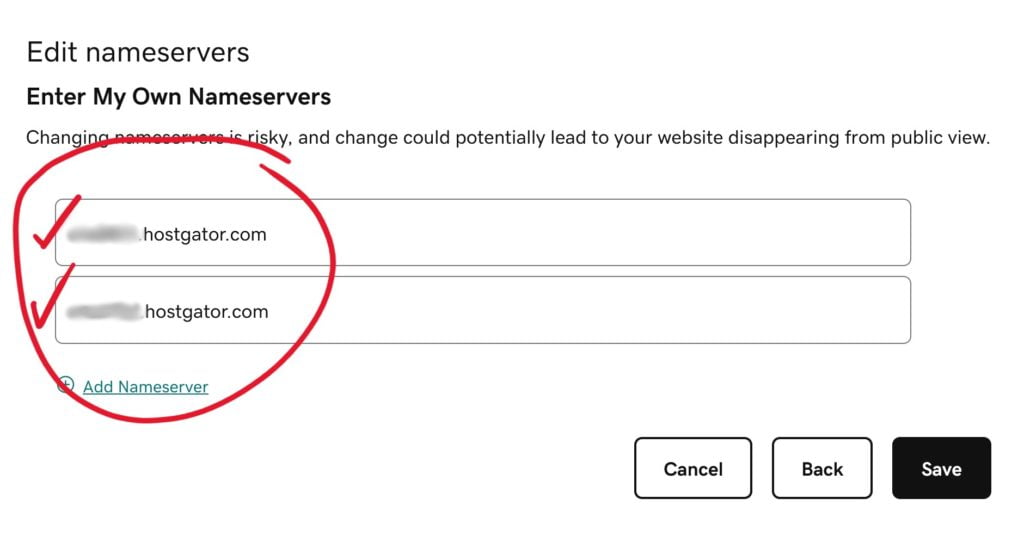
Once you click save, the domain will now be pointed at your webservers. They say it may take some time for this to take effect but I have found that it works quite quickly.
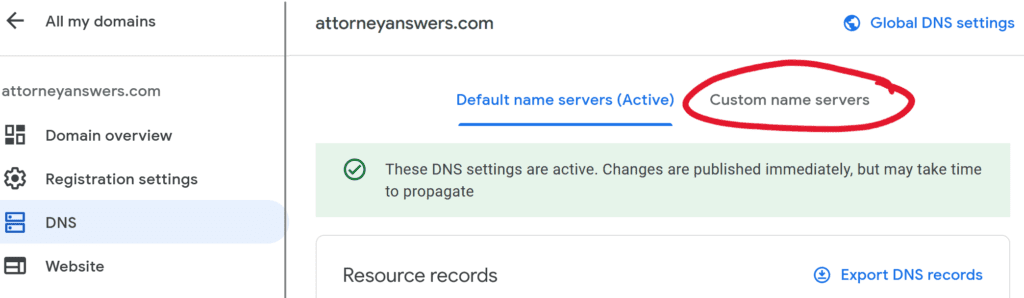
Changing nameservers on Google Domains:
Switching your DNS in Google Domains is a very similar process.
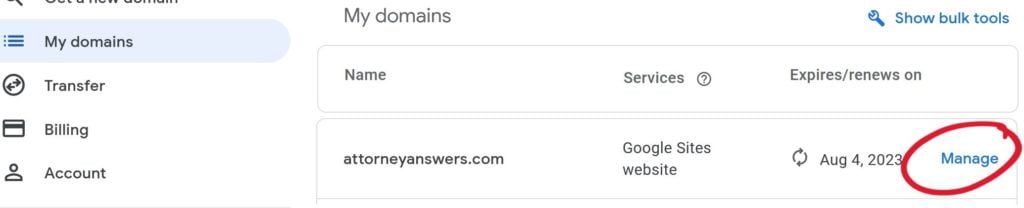
When you login to Google Domains, you select “Manage” for the domain you want to change:
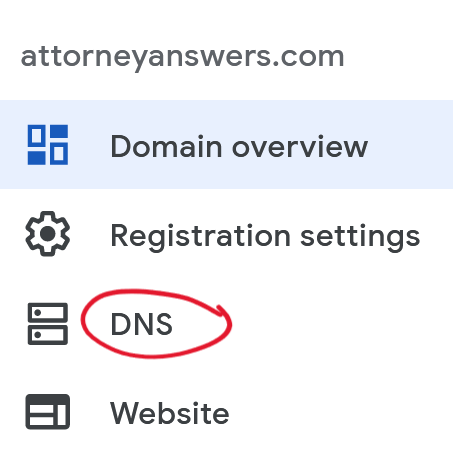
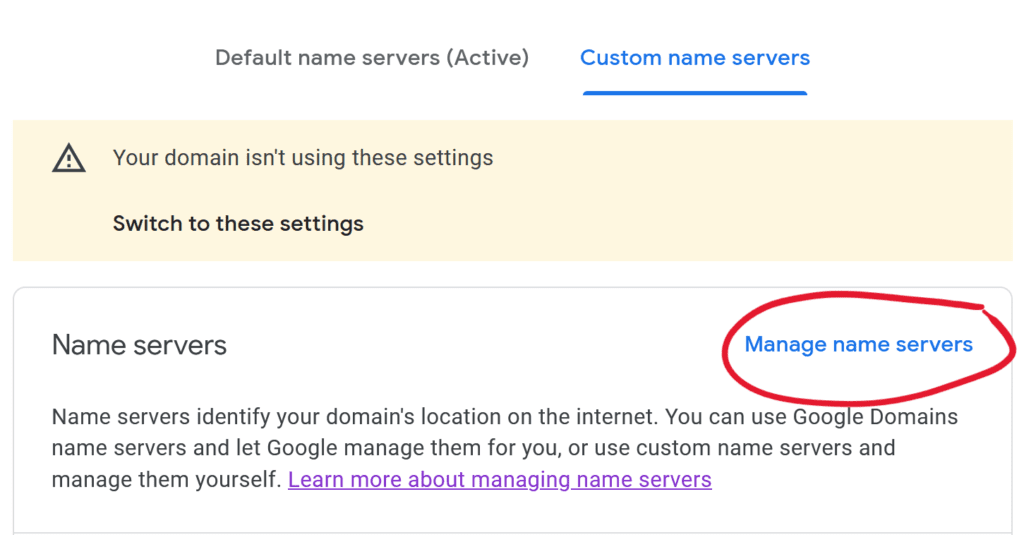
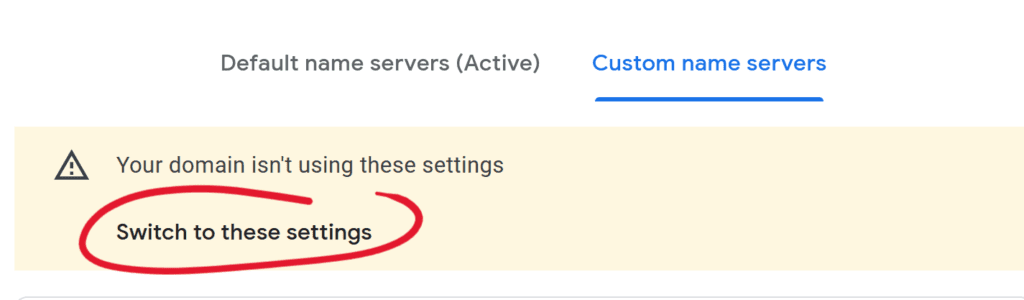
This gives you tabs for “Default Nameservers” or for “Custom Nameservers.” Click “Custom Nameservers.”
But you can panic if you want. Totally up to you. You don’t have to do what I say.
Step 4: Install WordPress
As mentioned, your webhost is where you build your house and you need to use a program to build it. One of the most common programs to do this is WordPress. The webhost should have an option to install WordPress.
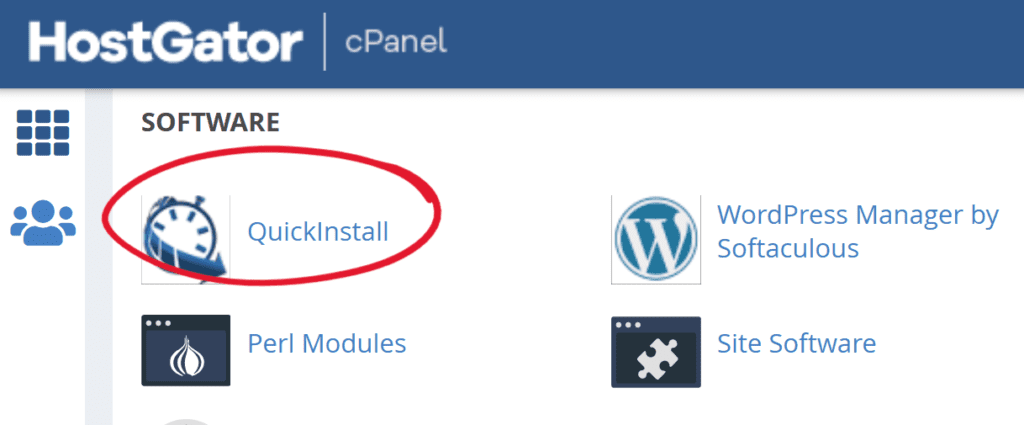
In HostGator, you can use “QuickInstall” as found by scrollign down to the Software section of OkprincipStatus 0th0e cpanel.
That’s really all there is to that. Once WordPress is installed and your domain is pointing to the nameservers on your selected webhost, your website is live and ready for action. Now you just have to design it!
Step 5: Upload a theme to WordPress
If I were to compare wordpress to video games, WordPress is the vanilla game. But it allows you to install mods to make your website appear and do different things. This is done through installing overall website themes, plugins for specific items, and customizations using HTML or CSS (which is optional–well it’s all optional really. You don’t have to do any of this).
I use “Optimizer WP” as my theme. I just think it is fairly intuitive to customize.
Another popular theme for customization and features is Astra/Elementor. I have used those but the learning curve is much steeper. I spent a lot of time setting up a site and I really liked how customizable everything was. My problems was that once I set it up, I forgot how everything worked together. So when I wanted to make changes, the Astra theme was just harder to navigate. I felt like I had to relearn it. This was such a deterrent that I ended up not even making the changes I wanted (in fact I eventually changed the website back to OptimizerWP).
The folks at Optimizer explain the difference between OptimizerWP and Astra/Elementor this way:
Optimizer was build for entrepreneurs and small business owners who do not have much time to fiddle with designing website to perfection. Optimizer was made such a way, so you can insert few pre-designed sections, change text or image and get your site live. Although you can create many different layouts with each sections, but it is not as robust as a page builder Like Elementor.
Forum post, October 3, 2020.
And that’s my story
I’ve greatly enjoyed tinkering around on the web. There was actually a point in time where I thought I might want to ditch the practice of law and get into web design full time. I still have some projects in the back of my mind and may work on them from time to time.
Up next on this project, I will share how I came up with my logo and what programs I used for that.
If you’ve been interested in starting your own online project, I’d love to hear about it! Share in the comments! (But only if you want to).